 You Don't Have To Be Rich To Travel
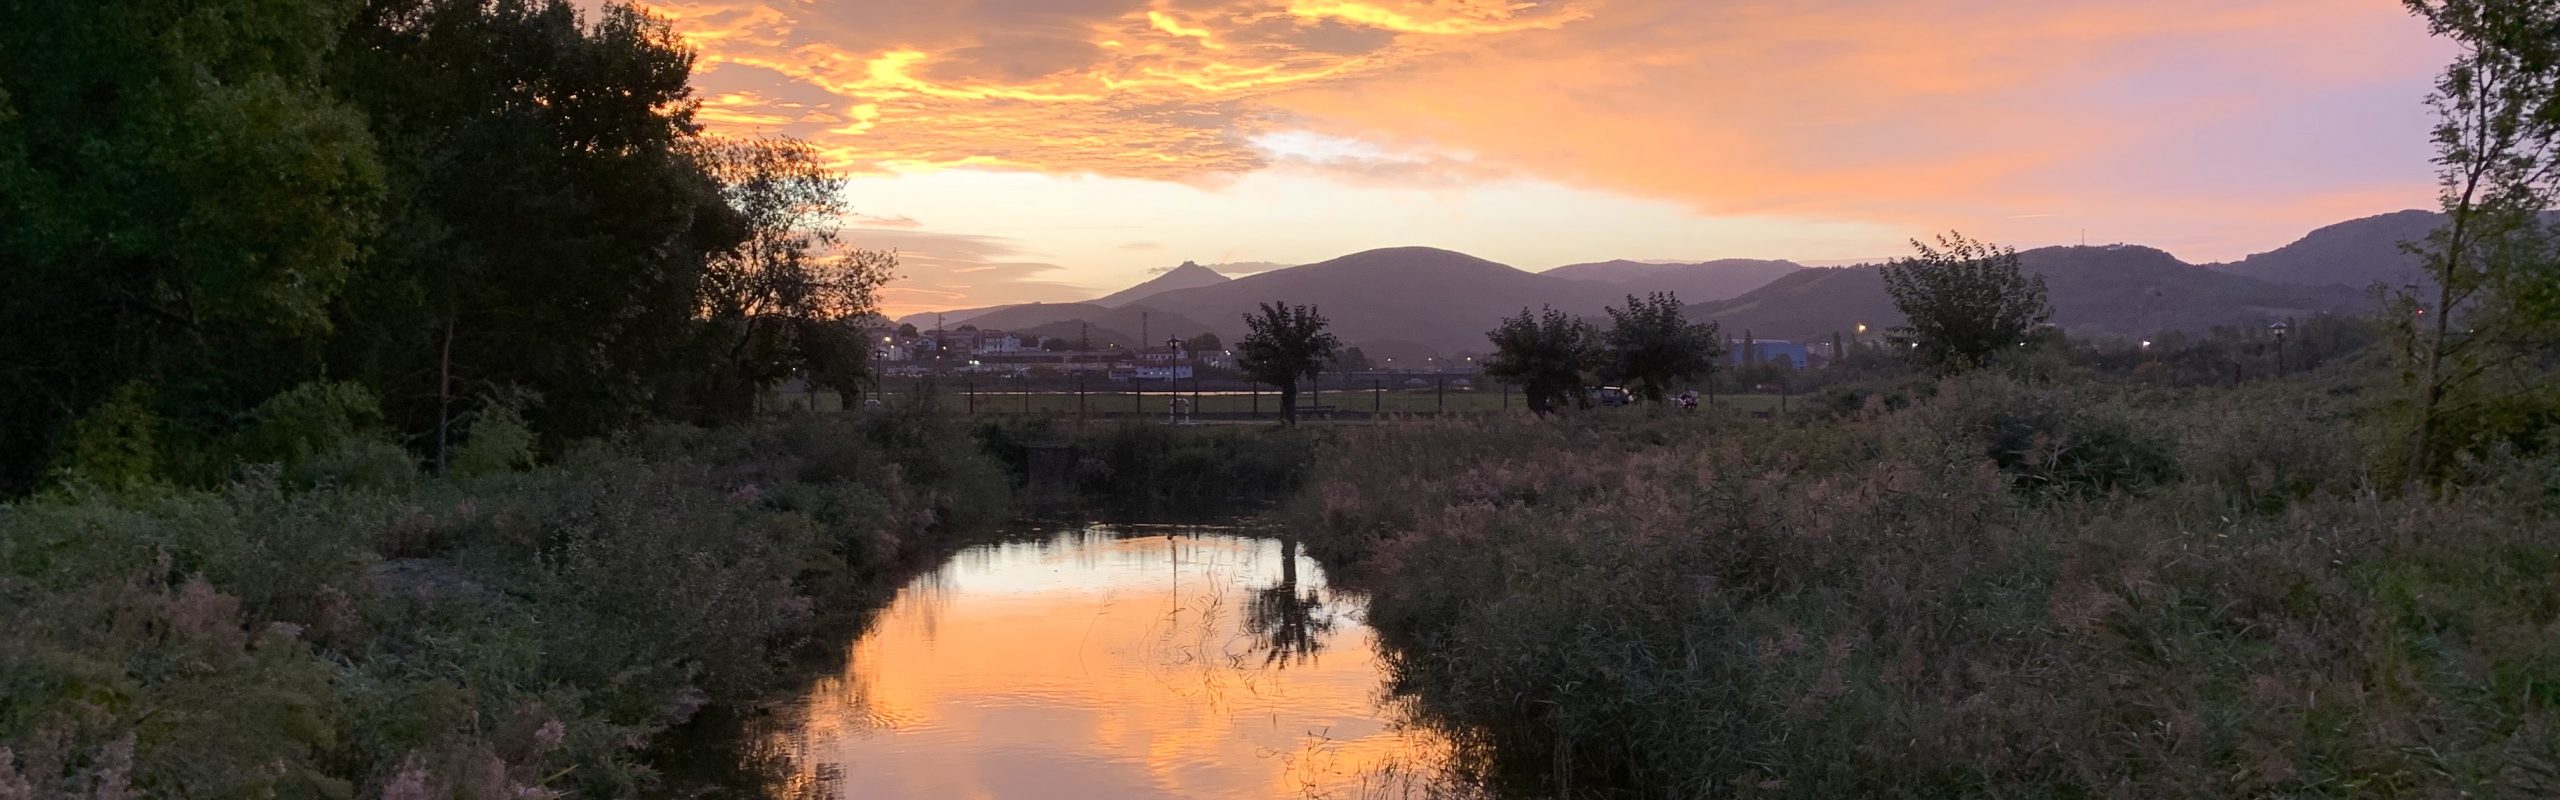

Malta is an underrated travel destination. Did you know that Malta has 3 islands? I’ll show you how you can travel around Malta on a budget.
This year for my birthday I decided to do a quick getaway trip to Malta. I had never even 
heard of it until I saw a Buzzfeed video of Malta and then videos of the beautiful Blue Lagoon. We definitely explored much more than that. Malta has 3 islands, the main island which gives name to the country, Gozo, and Comino, where the Blue Lagoon is located. I had an amazing time taking in all the beautiful scenery so I wanted to share some tips and where to go if you ever decide you want to visit here. How To Travel Around Malta On A Budget How To Travel Around Malta On A Budget
Tip
Malta is very busy during the summer season so going in October was a win. With the temperatures around 75 degrees and less tourists, this made our experience more enjoyable.
Wear your sneakers when visiting certain sites. Malta is very rocky and walking barefoot or in thong sandals is not ideal and can be dangerous. How To Travel Around Malta On A Budget
Download the app “eCabs” which is similar to Uber. One of the nights we were  wandering around aimlessly trying to find a taxi at night. I was able to hail an “eCab” driver within 1 minute.
I brought the wrong wall adapter…so don’t forget to bring the 3 prong adapter that looks like this.
Reservations for dinner – Although we went during slow season, the restaurants remain busy so be sure to call and make reservations at the recommended restaurants. Please check your receipts and if you are paying in cash make sure to double check your change. We had an incident at a cafe where the servers tried to steal a couple extra € from us – not cool.
What To Bring
- Credit cards are accepted at most big restaurants however you will need cash for the ferry rides and gas (if you are renting a car)
- Water shoes and waterproof bag for the Blue Lagoon
- Mosquito repellant and sunscreen
Renting A Car VS. Public Transportation
When I travel I’m all about using public transportation and saving money. However I did extensive research when I was planning my trip and although the public transportation works great in Malta, it can take a while to get from one place to another, especially during peak travel season. For example, a 20 minute car ride can take 1 hour via bus. Also, there were some locations that can be only be reached by car.
Public Transportation Cost:
Single Ticket: 2€
12 Single Day Journey – 15€
7 day unlimited pass – 21€
In the island of Gozo there is a Hop On & Hop Off Bus (18€). Great price, however the downside to that is that the bus only comes once every 45 minutes.

We decided that it would be best to rent a car. Even though the bf has never driven on the left side of the road (that means shifting with your left hand as well!), we figured it would be alright since I’m an outstanding co-pilot. Renting a scooter would be suicidal since the roads are pretty bad with a lot of pot holes.
Some things to know before renting a car:
- The driver must have an international driver’s license (easily obtainable at a Triple A office for $20). It was one of the first things the car rental agent asked when we
 arrived at the counter
 - You have to know how to drive a stick shift
- Book through priceline.com with a major company such at Hertz. Smaller companies may have hidden fees, etc.
- DO GET THE INSURANCE – remember, you are driving on the left side of the road along with many other tourists who are not used to this. Ease your mind and purchase insurance through priceline. Ours was $11/day. If you wait to get to the counter Hertz will charge you a much higher price, sometimes costing more than the rental itself.
- Have that proof of insurance email ready. Rental car companies make money when they sell additional insurance so our agent wasn’t exactly happy when we firmly declined their insurance.
- Okay – don’t freak out but Hertz did a 7,000€ hold on my credit card. I don’t even think the car we got was worth that much. Good news is after I returned the car the hold was off my credit card the next day.

- Triple check your car. Because we declined their insurance the agent clearly gave us the shittiest car they had. After getting the keys we did a walk around and found 9 more dents. We had to walk back to the rental counter so the agent could sign off on all the extra dents.
- Remember where you picked up the car rental because this is the same location where you will be returning it. I say this because when it was time to return the car I didn’t see any “car rental return” signs.
- Parking – Free parking anywhere within the white lines
- GoogleMaps was 95% accurate. On a couple occasions it sent us down the wrong way on a 1 way street and 1 other time it sent us down a really scary windy dirt
 road.
road. - Don’t want a big logo on the side of you car screaming “I’m a tourist, come rob me” so I wouldn’t recommend renting from GoldCar.
Finding the best route – I researched all the locations that I wanted to visit and “starred” them on google maps. After looking at the map as a whole, I was then able to plan my route so it would be the most time effective.
Travel Cost Breakdown
RyanAir Round Trip Flight From Barcelona: $70 USD
AirB&B in Gzira, Malta: $75 USD/night
AirB&B in Marsalforn, Gozo: $40 USD/night
Hertz Car Rental: $92 USD for 5 days, $11 USD/day for insurance via Priceline, 30€ for gas
Driving Itinerary – we encountered one day of rain so we had to switch some locations around but here is my recommended route.
Day 1 – Malta Island
- Walk around Cospicua, Vittoriosa, Senglea – Park near the water front. Nice view of the city (Street parking)


- Blue Grotto – you can take a boat tour for 8€. Unfortunately it was too windy when we came but you can take a beautiful scenic photo on top (Parking lot)


- Marsaxlokk – Eat seafood at T’Anna Mari – around 12€ for a yummy pasta dish. This area is known for the colorful fishing boats as well (Street parking)


- St. Peter’s Pool – 10 minute drive from Marsaxlokk. Swim at your own risk!! (Parking lot)


- Valleta – have dinner at Palazzo Preca. We parked our car near our AirB&B. You can take a ferry for 3.30€ or take a cab for 10€


Day 2 – Gozo Island
- Take the ferry from Malta Cirkewwa Ferry Terminal to Gozo Mgarr Ferry Terminal. Cost for round trip:
4.65€ per person
15.70€ 1 person and 1 car
CASH ONLY – You only pay on your RETURN to Malta island. - Stop by Mekren Bakery for some fresh pizza – 6€ – 7€ for a whole pie. CASH ONLY (Street parking)

Pizza is life! Stopped here to eat and enjoy the view.
- Explore Victoria (Street parking)

- Xlendi Bay – To the right is a set of stairs you can hike. It wraps around the bay and has beautiful views. (Parking lot)


- Dwerja and Azure Window – The Azure Window was a scene in Game Of Thrones when Dany and Khal Drogo got married but has sadly collapsed in 2017. There is a parking lot here. Sunset is the best time to come.


- Dinner in Marsalform – Il Kartell – best seafood dish on this trip!

 Scorpion Fish
 Seabass
Day 3 – Gozo & Comino Island
- Ninu’s Cave & Xerri’s Grotto – These natural caves were found when the owner of the home was digging a well. Ninu’s Cave (2€ donation) was alright because when we got down to the bottom there wasn’t much to see. But definitely check out Xerri’s Grotto (2.50€ donation). There’s a beautiful stairwell and the cave is quite large and we were able to walk around it.


- Blue Lagoon – A ride from Gozo to the Blue Lagoon and afterwards a tour of the caves costs 15€. Check out Comino Ferry Services. You’ll need to come to Mgarr Ferry Terminal a little early to find parking (within the white lines only). Bring your water shoes and waterproof bag. Just a reminder that it’s very rocky so water shoes would be the best thing to wear. Also, there’s another small island across from Comino that you can swim to. Definitely do not leave your belongings on Comino, so pack it in the waterproof bag and swim across. Tip: For the cave tour, sit in the very back of the boat to get the best unobstructed views.


- Tal Mixta – After the tour of the caves and returning to Gozo we drove through a dirt road to Tal Mixta. Park your car along the road and then you will find a hidden stair to go down to this beautiful view of Ramla Bay.


- Salt Pans – on the way to the next location!

- Wied Il Ghsari – You will have to drive down another dirt road and walk the rest of the way down here. I recommend coming for sunset for the best photos.


- Dinner in Marsalforn – Otters Bistro & Lounge – waterfront restaurant.


Day 4 – Back to Malta Island
Before heading to the airport there were a couple more places we wanted to see. Head to the Gozo Mgarr Ferry Terminal and take the ferry back to Malta. That’s when you will have to pay.
- Popeye’s Village – an actual movie set. It is now a waterpark attraction. 14.50€ during summer (June to September) and 10.50€ during off season (October – May) Parking lot

- San Anton Palace – Official residence of the President (Street parking)

- Mdina – Beautiful fortified city. Parking lot/street parking

- Airport – fair warning, google maps took us to the airport but I found it difficult to get into the airport because of the lack of signs.
My Experience Putting Gas In The Car
I’m not sure if this goes for all gas stations but this particular gas station which is the nearest to the airport was a ripoff. I’m not talking in terms of price but the method that is used when refueling your car.
First you have to see how much gas you have left. In this case, we had 1/4 of a tank left. Then you have to go to a machine which only accepts bills, no coins! That means the lowest bill you can put in there is a 5€ bill. To add to that, if you put in more money than you need then YOU GET NO MONEY BACK, you just have to guess. First we put 20€, turned on the car and it wasn’t quite full. Then we put in another 5€ and it was almost full but not all the way. We then put in another 5€ and said f it. What a total ripoff.


Even though we almost were t-boned while driving and followed google maps through some terrifying roads, I’m happy to make it out alive. And overall I had the best company which made my time in Malta so memorable. I wasn’t too impressed by the city itself but mother nature is so amazing and going to these sites took my breath away. Malta will always have a special place in my heart.


If you enjoyed my How To Travel Around Malta On A Budget blog, then you’ll want to check out my other European destination blogs.

This Travel Guide To Berlin On A Budget will give you tips on where I stayed, how to get around using public transportations, things to see and what to eat.Get ready for a change of scenery because as my friends mentioned this city is really “grungy and grimy.”
Berlin is full of history, graffiti art and has a hipster-ish feel. It lacks the charm that most other European cities have because most of it was destroyed in WWII.
Tip Travel Guide To Berlin On A Budget
Make sure to always have small change on you because free bathrooms are hard to come by. Also, half of the places I went to accepted CASH only. Bummer! There are 2 airports (TXL or SXF) you can fly into so I flew into whichever was cheapest. There is no Uber here but you can order a taxi with your “MyTaxi” app.
SIM Card – It was difficult getting a SIM card for my friend and in fact she ended up not getting one. There are no SIM card kiosks at the SXF airport. When we got into the city we went to a Vodafone store and they said it would take 3 days just to activate it. My suggestion is to pre-order a SIM card before visiting here.
Shell Game Scam – I saw this when I was checking out the Berlin Wall. DO NOT PLAY THIS because you will lose your money! You can watch a video of the scam here.
Travel Cost Breakdown
Wizz Air Flight from Budapest (BUD) –> SXF: $47
AirB&B: $60/night + Cleaning Fee + Service Fee
RyanAir Flight from SXF –> Barcelona: $49
Temperature in beginning of September: around 75℉ during the day and 60℉ at night
Public Transportation
Cost:
Single Ticket: 2.80€
4 trip tickets 9€
Day pass for Zone AB: 7€
Day pass for Zone ABC: 7.70€


Berlin uses the honor system so you should be validating your ticket at the machines. I got the day ticket for each day because it was well worth it. Once you validate it, the ticket is good until 3 am of the next day (the fine for not having a validated ticket is 60 €).
Google maps did just fine for me, except a couple times when I was taking the subway and I wasn’t sure which direction I was supposed to go. I finally figured it out by looking at a physical subway map.
From the airport to the city I needed a ticket that included the C zone. If you get the day pass, only validate it ONCE. Validating it again will make it void. Once you’re in the city you only need a ticket for Zone A & B.
Free Tours
There is a free walking tour to get your bearings if you’re interested. Just tip at the end.
You can also find bike tours ranging from 22€ – 28€.
Things To Do
Brandenburg Gate – Best known landmark in Germany
Berlin Wall – Start at East Side Gallery and work your way down. Tons of amazing graffiti work.


Checkpoint Charlie – Crossing point between the East and the West during the Cold War. 3€ to take photos with these guys!
Memorial To the Murdered Jews – Holocaust Memorial
Reichstag Dome – It’s free entry to go inside but you need to make reservations! It includes an audio guide. Best time to go is sunset hour.


Potsdam – Visit the Sanssouci Park for free. You can get to Potsdam with a Zone ABC Ticket.


Day Trip to Dresden or Hamburg – I didn’t get a chance to go but I found bus tickets for around 18 € round trip.
What To Eat
Cocolo Ramen – decent ramen – perfect for hangovers


Curry 36 – A very popular fast food join – Get a currywurst!


Markthalle Neum – I came on a Sunday and the line was out the door, but don’t worry, the line moves pretty fast. Every week there´s a different theme. For example when I went it was a coffee festival! Entrance to get in is 5 €. You can check the calendar of events here.


Maximilians Berlin – Traditional German food. Get the pork knuckle!! It was so juicy.


Mustafa’s Gemuese Kebab – another famous food cart down the street from Curry 36.
Klunkerkranich – A very very hipster rooftop bar in a parking lot mall. This place is a dope hangout spot! I believe the cover is usually 4€ and it’s CASH only. There was food, music and a live poetry reading


And finally we went out one of the nights to Club Der Visionaere (also CASH only). Really cool outdoor bar. We had so much fun that we ended up going home at 6 am!


Happy traveling!
If you enjoyed my Travel Guide To Berlin On A Budget, make sure to check out my other budget travel guides for other European destinations.

Did you know that Budapest is divided into two different areas? Buda which is on the  west side of the Danube River and Pest which is on the east side. This Budget Travel Guide To Budapest will give you tips on where to stay, what to see (Instagram Worthy Locations), where to eat and how to get around using public transportation.
My friend and I spent two days there and it was enough for us. Budapest is a pretty cheap city to visit in terms of lodging, food and alcohol. Based on my experience I would say that if you are a solo female traveler it’s a little unsafe at night. Most of the people causing problems were male tourists. I could hear them shouting out of the taxis at us, the men making weird noises eyeing us up and down. One tourist even grabbed my gf’s ass. At the bars, the creepy men would just come and try to touch us. We almost got into several fights in this city.
Tips:
There is no Uber here but everything is pretty much walking distance.
Even though Hungary is part of the EU, this country uses their own currency, Hungarian Forint, instead of euros.
$1 USD = 280 HUF
You won’t need too much cash because most restaurants and stores accept major credit cards. If you do decide to change money, please be careful because there are old bills that I came across that I couldn’t use.

Old Vs. New
Travel Cost Breakdown
RyanAir Flight: Barcelona (BCN) –> Budapest (BUD): $30
AirB&B: $29/night + Cleaning Fee + Service Fee
Bus from airport to the city: $3.20
Temperature at the end of August: 80℉
Public Transportation
Budapest was really easy to navigate and google maps worked great. When I landed at

Credit Cards accepted
the airport, I went to the Public Transport desk and bought a 10-trip coupon book for 3000 HUF ($10.77 USD) Perfect for 2 days. A day pass costs 1650 HUF ($6 USD) but everything is pretty close so I don’t think you will need it. You can also purchase the ticket for the airport bus (Bus #100E) to the city for 900 HUF ($3.20) If there’s a long line you can go out of the airport and buy tickets at the automated machines located in front of the bus.
When you enter the bus or subway, look for the ticket validating machine. Then you insert your ticket with the numbers facing up. See photo for reference.


**Note – not all subway stops have ticket booths selling tickets and at some stops they have workers making sure that you validate your ticket.
What To Do
The Parliament – You can take a water taxi to get to the other side for the best photo. At night time it is so beautiful.


Szechenyi Thermal Bath – this bath is the most popular one. I went at 7am before it got crowded. Get a cabin rather than a locker (5700 HUF = $20 USD – this price includes the entrance fee) Also don’t forget to bring a towel and flip flops. If you want to do laps in the large swimming pool remember to bring a swimming cap. Of course all of these can be rented but for a ridiculous price.
Tip: If you want to book a massage make sure to do it in advance. You may view the prices here. Email: info.szechenyi@spabudapest.hu.


Vajdahunyad Castle – right next to the Szechenyi Bath


Nightlife
360 Bar – Beautiful rooftop bar. It’s more posh and there are some great selection of

Bar 360
cocktails. When I tried entering early in the evening the security guard asked if we had reservations…which we didn’t. Then he asked us for a cover charge to get up 1000 HUF ($3.57 USD) We ended up just coming back around 11pm and got in for free.
Tip: Make reservations here.
Koleves – Stumbled upon this really cool hang out on the way to the ruins bar. This place has a couple of hammocks you can chill in.


Ruins Bar – basically abandoned buildings and parking lots turned into a cool bar.
- Szimpla Kert – the most popular one. By 11:30 pm on Friday they were at capacity. Don’t worry, the line moves fast. They do bag checks so no water bottles or weapons. Drinks are about $5 USD.


- Kuplung – it’s not as popping as the other place but it’s still nice. CASH ONLY


- Instant – huge space…and probably my least favorite

Places To Eat Budget Travel Guide To Budapest
Hungarian food is really heavy. They’re known for goulash, chicken paprikash, and pancakes!
Cafe Bouchon – Try the foi and the Hungarian pancake here


Cafe Vian – The chicken paprikash and dumplings (that sauce is heaven). Our server promised to email me the recipe.


Gozsdu Bistro – Nice terrace. I tried the Hungarian liquor “Palinka.” Not a fan.


Hungarikum Bisztro – Sadly I didn’t get a chance to go here because reservations were required and they book out 1.5 weeks in advance. This restaurant has over 8,000 reviews! Make reservations here.
Menza – Duck breast and goulash


New York Cafe – This place is pretty popping. Expect to pay $10 for a cup of coffee. It’s certainly overpriced but you are paying for the ambiance. It is so beautiful with a live classical band. Make reservations!! This place has over 13,000 reviews on TripAdvisor.


If you enjoyed my Budget Travel Guide To Budapest, make sure to check out guides to other European destinations.
Safe travels everybody!!

Toronto in the summer reminds me of California….except the people here are nicer. This was a work/leisure trip and I’m so glad that I got to hang out with some of my friends who I hadn’t seen in a long time! This Budget Travel Guide To Toronto will give you tips on where to stay, what to see (Instagram Worthy Locations), where to eat and how to get around using public transportation.
Tips Budget Travel Guide To Toronto
The week I was in Toronto there were so many events going on. You can click here to see the upcoming events. Most places accept credit cards so be sure to input it on your mobile device for quick checkout. Uber/Lyft is available in this city however I got by with the public transportation just fine! Bring a picnic blanket so you can chill in the parks.
If you like to drink alcohol like me, you can buy liquor at the LCBO locations. You won’t find liquor in any grocery store.

Alcohol is expensive here.
Travel Cost Breakdown
Flight from BCN –> YYZ: Ridiculously expensive during this time of the year (August.) I was lucky to have work pay for the flight.
Accommodation: AirB&B $54 USD/night in Danforth hosted by Maggie and Shane – Prime location! (Updated 2020 – the AirB&B is no longer available)
Public Transportation
Before traveling to Toronto I thought it would be a good idea to ride bikes around town so I downloaded the Bikeshare Toronto app. You can get a day pass for $7 CAD or a 3 day pass for $15 CAD. However when I got to Toronto I realized that it’s quite dangerous riding a bike through town due to the lack of bike lanes and to top that off, I’m an inexperienced rider.


No worries because the public transportation was easy to figure out. I used google maps to find my routes. If you want real time updates download the RocketMan app. You have the option of taking a bus, street car, or subway. The best thing to do is to go to a station and buy “tokens.” Tokens are $3.25 CAD each. A day pass will cost $12.50 CAD.
On the weekends you can get a day pass and share that with another adult.
When I entered a station I walked in where the ticket sales clerk is and tossed a token into the clear plastic container. Then there is a red machine for “proof of purchase.” I always got my “proof of purchase” for transfers just in case I got stopped. I didn’t get any cell reception underground but there is free wi-fi for 30 minutes.
Tip: screenshot your route.


When taking a city bus enter in the front of the bus and toss a token into the clear plastic container. Make sure to get a “proof of purchase.” You may also pay cash to the driver (exact amount only)
When taking a streetcar just hop on and there should be a machine to insert your tokens or coins. NO credit cards.

Streetcar Ticket Machine
For more information on Toronto’s public transportation click here.
What To Do
Side Tip: There were so many places I wanted to see and restaurants I wanted to eat at. The best way to plan your route is to go on Google Maps on your phone and “bookmark” all the places you want to go to. Then you can see on the map which areas to hit up first.
AGO – Art Gallery of Ontario – Free on Wednesdays after 6pm
Visit Casa Loma – Tickets to go in are $26.55 CAD or you can just take a nice photo outside.


Danforth – Greektown


Graffiti Alley – Don’t worry, it’s safe!


Kensington Market – Really cool area for restaurants and shopping

Nathan Phillips Square – Toronto Sign. At night time, it’s lit up


Queen Street West – shops and stores and then have a picnic at Trinity Bellwoods Park
St. Lawrence Market – There’s a farmers market here on Tuesday through Sunday
Toronto Island – By far my favorite place to visit during the summer. Make your way to the Jack Layton Ferry Terminal. Tickets are $7.87 per person. Upon arrival there was a long line to purchase tickets so I purchased tickets online on my phone and walked right through. After the 10-15 minute ferry ride I walked directly to the bicycle rental shop. There are literally no cars on the island so it’s very safe and it’s the best way to explore the island.


What To Eat
If you don’t already know, my go to restaurants when I travel are Asian cuisines because I miss it so much!


Banh Mi Boys – More than 1 location and good size portions


Broadview Hotel – Top floor – Great views with great drinks and small plates


Glory Hole Donuts – Can’t have just one
iHalo Krunch – I went here 3 days in a row. It is really that good. More than 1 location
Kinton Ramen – More than 1 location


Kost – Rooftop restaurant with an amazing view
Pai Northern Thai Kitchen – Get the Miang Kung dish


Pho Tien Thanh – This hit the spot


Rol San Dim Sum – Came here twice. There are two large dining areas. Go to the one in back.

Wilbur Mexciana – Not the same as California Mexican food but the Elote was on point!!


If you enjoyed by Budget Travel Guide To Toronto and want to explore a different part of Canada, please be sure to check out my Travel Tips to Quebec City.

San Sebastián and Bilbao was a fantastic getaway from the Barcelona heat. We started at the food capital of Spain, San Sebastián. Then we took a bus to Bilbao to visit “Dragonstone” the well known show Game of Thrones and the famous Guggenheim Museum. The basque language is quite interesting because no one really knows where it originated from, though I got by fine just speaking English and Spanish.
Tip WHAT TO DO IN SAN SEBASTIÁN
Seems like half of the restaurants I went to didn’t accept credit cards, therefore you will need small bills/change for the bus/metro rides around town. We went at the beginning of August and if you didn’t already know, many of the locals go on vacation and shut the stores/restaurants for the entire month.
Travel Cost Breakdown
Flight from Barcelona (BCN) –> San Sebastián (EAS) on Vueling Airlines: 45€ Total
Hotel – Pensión Riberas del Urumea – $154 USD – I used a voucher for $115 USD from hotels.com = $39 USD
1st Stop: San Sebastián
I almost didn’t make the flight due to the Barcelona Taxi Strike. I was okay getting to the airport with public transportation however, the taxis literally blocked the road to the airport by parking their vehicles on the road. Not only that, they were attacking Uber and Cabify drivers and that made me so mad I told myself I would never take a taxi here in Barcelona ever again.

How To Get From the Airport To City Center
- Taxi – around 40€
- Bus – use your google maps for this. You’ll have to exit the airport and walk along a busy highway for around 11 minutes (kinda scary but there is shoulder room). Cross the street and it’s bus E#21 for 2.65€ – Cash only!
Need Luggage Storage?

There is the main train/bus station where you can store your belongings for 24 hours for just 5€.
Hours:
Weekdays 7:00 am – 9:45 pm
Weekends 9:00 am – 9:00 pm.
Where To Eat:
We all came here to eat right? I loved San Sebastián so much that I cane back and wrote an Ultimate San Sebastián Food Guide. Expect to eat a ton of yummy cheap pintxos for breakfast, lunch and dinner.
Here are the places I checked out during my first trip here:
Bar Sport – One of the few pintxos place that opens at 10:00 am. Great variety of affordable pintxos.


Borda Berri – this place gets packed so I recommend coming here when they open at 12:30 pm and again at 7:30 pm.
Here are some of my recommendations: pork kebab, risotto, veal cheek, gazpacho, squid ink ravioli, and pig ear. We got all this and 3 glasses of wine for under 30€.


Gandarias Jatetxea – Opens at 11:00 am until midnight
La Cuchara – Opens at 12:30 pm and then again at 6:00 pm. Get the beef cheeks, foi gras (very very generous portion), and ugly tomato salad.


What To See
Besides stuffing our faces with food, we did hang at the famous La Concha Beach. Then we did the Hop On & Off City Tour Bus for 12€. Definitely was not worth it because there is only one bus at a time so if you hop off anywhere along the route then you have to wait for an hour for the next bus to come. You’re better off doing the city train ride for 5€.


2 full days here and then we were onto the next city, Bilbao, which is a 1 hour and 15 minutes bus ride and the cost – 6.65€.
I highly suggest visiting Bilbao after which is a short bus ride away. There you can visit the famous Game Of Thrones Dagonstone, check out the Guggenheim Museum and of course enjoy great food. Don’t forget to read about my 2nd trip back to San Sebastián and check out the my Ultimate San Sebastián Food Guide.
Happy traveling!

After visiting San Sebastian for an epic food tour, the next stop on the list was Bilbao. I’m sure most of you have seen the show Game of Thrones. That Dragonstone scene is actually filmed here in Bilbao. In this blog, you’ll find out How To Visit Bilbao and instructions on how to get to Dragonstone!
Travel Cost Breakdown
Bus from San Sebastián to Bilbao – 6.65€ with Alsa Bus
AirB&B Bilbao – $64/night – Josune is a fabulous host and I highly recommend staying here!
Vueling Airlines BIO –> BCN – 30€
Navigating in Bilbao Using Public Transportationow To Visit Bilbao and Dragonstone
Purchase your Barik card for 3€ at a metro station. Trust me, this  card will save you around 40% for fares on the bus, tram, and metro and be sure to scan IN & OUT for EVERY ride. You can top off with a minimum of 5€ each time.
Metro ride: 1.60€
Tram ride: 1.30€
Day Trip to Dragonstone AKA San Juan de Gaztelugatxe (Don’t worry – I still cannot pronounce the last part)
Before You Go
* When I arrived, they asked me if I had reservations? WHAT?? No – I didn’t know  anything about making reservations but they were nice enough to let us in. That being said, reserve your tickets by clicking here.
* Don’t be like me and wear thong sandals – The first half of the hike is a steep downhill and I was panicking the whole way down thinking that my sandals were going to break at any moment.
* Bring water – there is one water fountain at the base of the stairs…and no bathrooms when you reach the top.
How to get there: **Please note these prices may change**
* Find your way to Placa Moyua. You want to take the bus to “Bakio #3518” that stops in front of the Levis Store. It comes at :15 and :45 of the hour.
Cost without the Barik Card: 2.55€
Cost with Barik Card: 1.70€


Get off the stop that has the “Information” Building. Don’t forget to scan once again on your way off the bus. The clerk working at the desk will provide you with maps. Then the next bus #3517 will arrive. Get off the next stop and you’ll walk down the curved street on the left. You’ll reach the entrance after the parking lot. The hike up to the church isn’t so bad. Once you get up there make sure to ring the church bell 3 times for good luck! Best time to go is early in the morning to beat the crowds and the heat.


After taking a million photos we hiked back up and took a bus to the next city, Bermeo (5 minute ride and less than 1€) and then took a train from Bermeo to Mundaka to check out the beach (also less than 5 minutes and less than 1€). We spent the rest of the day soaking up the sun. Then it was time to go home. There is a train that goes from Mundaka to Bilbao (1.5 hours with stops) for 3.30€.

Guggenheim Museum
Tip: Sign up for FREE to be a member. This enables you to skip the line to buy tickets (16€/ticket) once you reach the museum. When I went the line was 100 people deep so this came in handy. You can take plenty of photos outside of the museum but when you’re inside no photos are allowed of the artists’ work. (I mention this because I didn’t know and I got yelled at a couple times – whoops)


Funicular
Your Barik card works here as well and you can go up for .60€ each way. Without the card the cost is 1.75€ each way.

Where To Eat
Cafe Iruña – Opens 7am – 1am – one of the oldest cafes in Bilbao. Beautiful interior and my favorite pintxo is the salmon with nutty cream cheese. Obsessed!


El Perro Chico – Opens 12:30 pm – midnight – I really enjoyed this sit-down restaurant. Order the suckling pig and the crispy chicken. The spring rolls were amazing and the cheesecake dessert was to die for.


El Globo – Opens 8:00 am – 11:00 pm – Always busy because their pintxos are yummy.
Coppola Bilbao – Opens 1:00pm to 11:00 pm – If you’re tired of pintxos, this Italian restaurant should solve the problem!


Getting To The Airport How To Visit Bilbao and Dragonstone
Head to Placa Moyua. The green airport bus #3247 will pick you up in front of the cream colored building “Delegacion De Hacienda.” It comes every :15 and :45 of the hour. Cost: 3€.

Happy traveling!
Curious about other Spain destinations? You can check out more travel guides here.

Traveling during peak summer season can be brutal. Because the heat is harsh and you’re likely run into grumpy tourists, overcrowded tours, and expensive accommodations. Well, you can explore Rome on a budget and with these travel tips, beat the heat!
I brought my travel umbrella to help with the intense sun rays, my hand fan, and my stainless steel water bottle that keeps drinks cold for up to 24 hours. Also, this ice cube tray is designed specifically for water bottles. Don’t forget your sunscreen AND mosquito repellant.


Travel Cost Breakdown
Flight:
Round trip BCN –> FCO (Rome – Fiumicino) on RyanAir – $97.73 USD
RyanAir has a bad reputation and is known as the Spirit Airlines of America. But how can you pass up on a deal like this? Other airlines were charging 3x the amount.
Tip:
RyanAir charges 55€ if you don’t have your boarding pass printed or on your phone. Above all, make sure your suitcase meets the requirements for carryon. They will charge you for everything.
Accommodations: If you are traveling with a large group of people, I recommend Camila Home San Lorenzo on AirB&B. This particular listing had 4 bedrooms and slept up to 10 guests. Cost: $94 USD/night!!! What a steal!!


How To Get From FCO Airport to City Center (Termini Station)
Flat Rate Taxi Fare:
FCO to the city center – 48€
Ciampino to the city center – 30€
Leonardo Express Train to Termini Station – 14€

Airport Transfer To City Center
Exit Terminal 3 and follow the signs for the bus. On the right hand side, there are stands selling bus tickets. A ticket costs 6.90€. No  advanced tickets are needed and credit cards are accepted. Once you get to the Termini station, there’s a tobacco store where you can buy bus tickets for 1.50€ each (credit cards accepted here as well.) I did an average of 2-3 bus/metro rides per day.
For your return back to the airport, just head to the Termini station and you can buy your bus tickets directly from the bus driver. I believe it’s cash only – I didn’t see anyone paying with a credit card.
Transportation: Bus Vs. Taxi
Public Transportation
Bus tickets are NOT available for purchase on the bus. I witnessed some tourists get fined 100€. You MUST validate your ticket through the machine. Tickets are available for purchase at tobacco stores, bars, newsstands or at major metro stations.
Fares
1.50€ each
24 hour pass for 7€/day
48 hour pass for 12€
72 hour pass for 18€. I don’t recommend getting the day passes – I did a mix between taxi and bus. You can read more about it here.
Because I like to travel on a budget I try to avoid taxis and instead use other means of  public transportations like bus or subway. Since we weren’t staying right in the center of Rome, I definitely needed to use public transportation but I was very disappointed. The buses were never on time and I recall waiting at a couple bus stops for over 30 minutes. On top of that, we had 5 people in our group so it was hard to flag down a taxi that could accommodate all of us.
Taxis
That being said, please download the “MyTaxi” app. It saved me many times because if we relied on public transportation, we would have been late for our tour activities. We made the mistake of getting into an unofficial private taxi and the rates were really high! The Rome city taxi cabs are all white with the number clearly written on the side of the car. Here’s an example of a price difference. From my AirB&B to the Colosseum in a regular cab cost me 12€. In the other “taxi” it cost me almost 20€.
Starting Taxi Fares
- Mon – Fri, 6am – 10pm €3
- Sat – Sun and holidays, 6am – 10pm. – €4.50
- Fare anytime from 10pm – 6am €6.50
By law, all taxi cabs are supposed to have a credit card machine. I happened to run into a few that said theirs was “out of order” so be sure to always have cash on you.
What To Do: Explore Rome On A Budget
Ladies, leave your wedges and heels at home because you’ll be walking on mostly cobblestone streets and uneven sidewalks.
Trevi Fountain – Went there at 6:30 am to beat the crowd. Face away from the fountain and toss a coin in with your right hand over your left shoulder.
Vatican City – Opens at 9:00 am. By 10:00 am there is a long queue, so I suggest getting there early. Ladies must cover the knees and shoulders. Men were supposed to dress in pants and no flip flops. It was summer and I saw many men in shorts and flip flops so I’m guessing they’re a bit relaxed on the men’s dress code. Photos are allowed but no flash photography. Explore Rome On A Budget


Sistine Chapel – I didn’t get to go here because the line was too long. Doors open at 9:00 am and it’s free entry. By 10:00 am the wait in the sweltering heat was 2.5 hours. You can purchase a Skip the Line Ticket for around 35€. No photographs allowed in the chapel.
Spanish Steps
Pantheon – Free Entry Explore Rome On A Budget
Colosseum – Entry Fee is 12€ and is good for 2 days. 
Bocca Della Verità – Mouth of Truth – 2€. Legend says if you’re a liar and you place your hand inside the mouth, you’ll lose some fingers.
The Aventine Keyhole – Free Entry – We waited in line for 5 minutes to peep through the keyhole. It was a beautiful view of the St. Peter’s Dome.
Golf Cart Tour
On our final day, we embarked on this wonderful 2 hour golf cart tour of Rome by MyBestTour.com. We had our own group of 14 people and the large golf carts can take 7 passengers.
Where To Eat:
We pretty much ate pizza, pasta and tiramisu every day for lunch and dinner. 1 of the nights we devoured a 2.5 foot long charcuterie board. I know there’s a million restaurants in Rome but these restaurants I can vouch for! Average cost for a pasta dish is around 7€-10€ and the special truffle dishes were around 10€-12€.
- Ciacco&Bacco San Lorenzo – Large charcuterie plate for 5 people – 30€. Reservations recommended since seating is very limited.
- Pizzeria La Casetta – Local spot near our AirB&B and my favorite tiramisu
- Ponte E Parione – Truffle pasta with bacon and the fried zucchini flower dish was to die for. The servers here also were very friendly and funny.
- Spaghetteria L’Archetto – So many pizza and pasta dishes to choose from!
- II Tempio Di Minerva – Pasta carbonara and ravioli with truffle & spinach
- La Gelateria Frigidarium – Gelato!!! 1 scoop costs 2€


Because of our short time I didn’t get to see as much as I would have liked to, not to mention that the heat was a killer, so every day we had to come back home to take breaks. I will be sure to come back to Rome so if you have any recommendations on other cool places or your favorite restaurants please share.
If you’ve enjoyed my Explore Rome On A Budget blog, check out another guide to Montepulciano, Italy – Wine Country!

Having been to London 2 times prior to this trip for the typical site seeing locations, I wanted a more different  kind of sightseeing. I wanted to check out the Top London Floral Instagram Locations.
Visiting London is NOT cheap but I was lucky enough to score a cheap flight from Barcelona and lucked out on finding a cheap accommodation.
Travel Cost Breakdown
Flights
From BCN –> LGW (Gatwick) Vueling Airlines $96.50
Or 9,850 points in the Chase Ultimate Rewards Portal
Accommodations
Millennium Apartments in the Shoreditch area $75/night on hotels.com
Hotels and most Air B&B were going for $150+. This particular room at Millennium Apartments was really tiny, but that didn’t bother me since I was out most of the day anyways. The Shoreditch area is a great location with its hipster-ish vibe and the tube just a 5 minute walk.
Airport Express Train Ticket
 Purchase your Gatwick Express ticket online using the route from Gatwick Airport to London Victoria Station. A round trip ticket cost me £32.70 ($43.73 USD) Your ticket may be cheaper if your flight lands after peak hours. Peak hours are first train of the day to those arriving at the airport before 10:00 am and in the evening it is between 4:30pm – 6:00pm leaving from London. You can purchase tickets once you land but be prepared to wait in a long line. Finding the Gatwick Express is fairly easy however make sure to have the ticket bar code handy on your phone because you will be scanning in and out.
Public Transportation
Once you get to the London Victoria station, you need to purchase the blue Oyster card which cost £5 (non-refundable) and then load the card with money. I wasn’t able to purchase the Oyster card through the self-service machine so I had to wait in line for the customer service rep.
There is a daily cap for using the tube in Zone 1 & 2. I spent a total of £25 in the span of 4 days and that included 1 trip to Zone 4 for the Kew Gardens. The Oyster card works on the city buses as well. To read more about it, click here. The tube operates from 5am – midnight daily with reduced services on Sundays. One ride in Zone 1 & 2 cost £2.40 with the Oyster card.
***Please note – when traveling via the tube, there are a lot of stairs to go up and down. Hopefully you have packed light! Your phone will not work underground so screenshot your google map routes before down underneath to the station. There is wifi underground but you cannot connect to it unless you are registered with their local phone services like Vodafone or Virgin. (It asks for a username login/password)
Uber vs Taxi
Uber works here! It’s way cheaper than taking those black taxis. If you don’t already have Uber, use my promo code: JennyC41


Book FREE tickets to the Sky Garden which is a glass dome that has a 360 view of  London. When I went 3 years ago, I went to the Shard (another tall building) – guess how much it was to go to the top? Almost £50 ($67 USD)!!!! Tickets to Sky Garden go fast so book at least 1.5 weeks in advance. You also have to pick a time slot. If there is no availability for the day you want to go, you can still get up there if you make reservations to one of their 4 restaurants.
Top London Floral Instagram Locations:
With the short amount of time in London, here are the locations I visited.
Peggy Porschen, Les Senteurs Perfumeria, Elan Cafe – There was a line for Peggy Porschen & Elan Cafe to sit down but you don’t have to wait in line to take a photo. You can also just order something small for take away.


Other locations that I didn’t have time to go to: Sanderson Hotel and Saint Aymes


Kew Gardens: £16 – You can purchase your tickets in advance online so you don’t have to wait in line when you arrive. Kew Gardens is in Zone 4.


Other Site Seeing:
If you want to do the usual touristy activities such as the Tower Bridge, Buckingham Palace etc, I found a blog in which you can refer to here.
Museums
Did you know that all the museums here are free? I only had time to check out the British Museum on the last day. Need a place to store luggage? I used stasher.com to find a place near the British Museum.


Drop by the Camden Market – Plenty of shops and trendy pop up restaurants.


Flying Out Of Gatwick Airport
Gatwick airport – TSA was very thorough with liquids in your carryon. The TSA agent pulled my bag aside and took out a couple items such as mascara and liquid foundation and put it in a ziplock bag and then I was on my way. Good thing is you don’t have to take off your shoes when going through the metal detector.
And finally the last thing to book before coming to London – if you are a priority pass  holder (Benefit or having a Chase Sapphire Credit Card) you should book a reservation at Gatwick’s airport lounge called No1 for your departure date. Call (+44) 844 264 6440. I tried getting in and the receptionist said they were full but that really isn’t the case. Priority Pass holders are bottom of the totem pole and they will try to sell you a pass to get in. Luckily, another place you have access to is the Grain Store Cafe & Bar in which they offer 15£ off your bill. Both of these lounges are located in the South Terminal.
If you enjoyed my Top London Floral Instagram Locations, then I think you’ll enjoy my guide to other European Destinations!

My goal this year was to explore the different parts of Spain. We only had 4 days in the South of Spain. In that amount of time, we were able to visit 4 different cities – Granada, Malaga, Marbella and Seville.
When To Go
I figured May was the best  time to go because the weather is perfect. In the summer, temperatures can reach well over 100℉. My gf Ava and I decided to book tickets when we found amazing deals on Vueling.com. It was my first time staying in a hostel and using a cool app called BlaBla car which I will explain later.
Tips
Bring cash because half of these places I went to didn’t accept credit cards. Also, the city buses we took accepts cash only. Wear comfortable shoes/sandals because all the cities we went to had cobblestone side streets.
Travel Cost Breakdown
Flight from Barcelona (BCN) to Granada (GRX): $30 on Vueling
AirBnB in Granada for 1 night: $60
Bus from Granada to Málaga: $13.30 with Alsa Bus
Hostel in Málaga for 2 nights: $44.14 – Lights Out Hostel
Train from Málaga to Seville: $38 (Roundtrip) – with Renfe
BlaBla Car from Málaga to Marbella: $10 (Roundtrip)
Flight from Málaga (AGP) to Barcelona (BCN): $56 on Vueling
1st Stop: Granada 4 Days in South Of Spain
Temperature in May: 77℉ and sunny.
We stayed in the area near the Catedral De Granada and it was perfect. If you decide to stay in the area of Sacromonte be prepared for a hike. From the airport, there is an Alsa bus that will take you to the center for 3€.
What To See
- The Alhambra – If you plan on going you MUST book your tickets in advance. I booked 1 month prior, however, the tours I wanted to go to were fully booked. The only ticket available was the Generalife Garden tickets. Click here to buy your tickets direct. Upon booking, the website asks for your passport/id information (which they didn’t check at the door.) You will also have to choose your allotted time slot. The gardens were magical! Take the public transport bus C3 to get to Alhambra (1.50€.) You can walk there but it will be a bit of a hike. If you want to take a taxi, the base rate starts at 1.62€.


- Granada Catedral – dress appropriately if you want to go inside. Entrance fee is 5€.


Where To Eat
Did you know that many restaurants here in Granada offer free tapas when you order a beverage? With that being said we went bar hopping and spent around 5€ for the both of us and by the 3rd stop we were full. Here are some bars that I suggest that won’t break your wallet:
- La Riviera – order a drink and choose which free tapa from the menu
- Bar Poe – order a drink and choose which free from the menu
- Bodegas Castaneda – order a drink and they will bring you a free tapa
- Bar Los Diamantes – order a drink and they will bring you a free tapa
Watch A Flamenco Show
Flamenco dancing originated from the south of Spain. We watched a beautiful dance in a cave up on the hill. The show cost 22€ and includes a free sangria drink. There’s really no public transportation that can take you up there so we took a cab which only cost 5€.
Museo De La Zambre – The show starts at 9:30pm and there are no bad seats.


2nd Stop: Málaga
Temperature in May: 73℉ and sunny.
How To Get To Málaga From Granada
The next day we took a bus from Granada bus station (1.50€ to get there by local city bus from city center) to Málaga. I pre-booked the tickets on Alsa.com and it was $13.30. The only problem is I had a hard time using my credit card from America. For some reason they only take local credit cards so I had to use my Spanish ATM card. The bus was pretty packed as well so I recommend going the day before or early in advance to purchase your bus ticket in person. The comfortable ride was about 1h4 5min.
Where To Stay In Málaga
Ava and I decided to stay at a hostel because we figured – why waste money on a hotel when we’re only going to be there to sleep? Hotels were going for $80/night + tax and this particular hostel Lights Out Hostel was around $18/night + tax. I use the website hostelworld.com to book. This hostel was a 20 minute walk from the bus station.
Tips for staying at a hostel:
- Bring your own towel. I bought this travel towel from amazon.com and it works lovely! If you forget your towel, the hostel can lend you a towel for an extra fee.
- Bring your own lock! Under the bunk beds were storage spaces to keep your belongings.
- Ear plugs is a must – I shared a room with guys that SNORED so loud. Thank god I had these.
- Bring sandals for the shower. Need I explain more?


What To Do In Málaga
- Once we checked in and changed, we took a walk down to the beautiful Calle Larios which is great for shopping.


- Alcazaba of Málaga – There’s also a combined ticket for the Gilgrafaro, but we came too late they wouldn’t let us see that. Tickets to Alcazaba 3.50€ which you can purchase at a ticket machine at the entrance. There was no line when we got there so I don’t think you need to purchase tickets in advance.


- Lastly, we walked along the beach and stumbled across the Gran Hotel Miramar and went up to the rooftop to take in the scenic views and drink overpriced beverages.

If you need a taxi the base rate here starts at 1.49€.
What To Eat In Málaga
Brunchit – Near Calle Larios – loved their selection of sandwiches and salads!
Recyclo Bike Cafe – great if you’re looking for a late meal.
3rd Stop: Seville
Temperature in May: 85℉ and sunny
How To Get From Málaga to Seville
We decided to take a day trip to Seville which only cost $38 for a 2.5 hour roundtrip ticket on Renfe.com. Seems like Seville was our favorite city due to the fact that we were surrounded by beautiful architecture.
What To Do In Seville
- Real Alcazar – Did I mention that Game of Thrones Gardens Of Dorne was filmed at Alcázar of Seville? Needless to say, BUY YOUR TICKETS IN ADVANCE. We made the mistake of not doing so and as a result we had to wait in a long line in the hot sun. General admission tickets was 11.50€ but you can purchase your tickets here. It’s worth it to pay the extra money to skip the line.


- Check out Plaza Españya and watch live street flamenco.


- Metropol Parasol: 3€ entrance fee to go to the top. Pay at ticket window.


4th Stop: Marbella
Temperature in May: 73℉ and sunny
How To Get to Marbella From Málaga
This was our last day. Hence our departure flight wasn’t until 9:30 pm. The goal was to do a day trip to Marbella and make it back to the airport on time. After doing research, it seems like the bus from Marbella to Malaga was going to cost us 30€ each for a 45 minute ride.
BlaBlaCar.com is a carpooling/ride share app. Everything was in Spanish but I managed to sign up/register with no problems.I found a roundtrip ride that cost 5€.
Locker Storage in Màlaga
Because we had to check out of our hostel, we needed a place to store our luggage. Málaga bus station has lockers for storage and the price of 3.50€ for the whole day. It’s accessible between the hours of 6:00 am till 1:00 am. We were able to fit 2 carryon size luggage and 2 backpacks in that locker.
This is where our BlaBlaCar driver picked us up and then we were dropped off at the Marbella bus station.
What To See in Marbella
- From the Marbella bus station, we took a taxi (base rate starting at 3.17€) to Puerto Banús which cost about 12€.


We took a few photos and then took a taxi to Old Town Marbella (12€) I’m in awe of this area. Narrow beautiful streets filled with flowers and quaint terraces.
If you’re searching the typical photos of Marbella, google these locations and you will stumble across these instagram worthy photos:
Bar Altamirano
Restaurante El Balcon De La Virgen
Lavanda Del Lago
La Bodeguita De Marbella


Where To Eat in Marbella 4 Days in South Of Spain
Casa Bar Bartolo – We found this cute restaurant with nicely priced tapas (2€-3€) and outdoor seating.

After many photos and roaming around the streets of Marbella, we took the BlaBlaCar driver and headed back to the Málaga bus station. We changed into our airport clothes and took a bus to the airport (3€). So long South Of Spain! It’s been truly a remarkable journey!
If you enjoyed my 4 Days in South of Spain blog and want to check out different areas of Spain, click here.

It’s been 2 years today since I had my first lumpectomy, April 28th 2016. I remember waking up this very morning and posting a video announcing my diagnoses to the world. When I woke up from surgery and looked at my phone, it was filled with messages of love and encouragement; messages from friends, strangers, and breast cancer survivors.
My life has forever changed, emotionally and physically. You can read about my journey with breast cancer here. Today I want to talk about how I’m doing 2 years later.
My scars are a reminder about what I’ve been through. Opting for a double mastectomy was the biggest and hardest decision of my life. I remember going through with the operation with no one by my side. I didn’t want anyone to see me look the way I did.

When I woke up I was anxious to know if i would still have my nipples. Somehow the thought of not having nipples made me feel as if I would be less human, so when my surgeon told me that I would be able to keep them, I felt such relief. Now two years have passed and my doctors told me if my cancer would ever return, there’s a possibility that it would be in my nipples. It’s very hard for the scans to detect cancer in that tissue area, so the thought of cancer returning haunts me every day. Specially considering that in my experience, when I first did my scans the doctors completely missed my tumor. Another thing to worry about.
Every year I come back to the US to do blood tests and I experience major anxiety. I have been poked and prodded way too many times because I have the tiniest veins, so every time I have to get my blood drawn they miss my veins several times.
My last blood test was quite alarming as it showed low count for white blood cells.
Doctors don’t want me to have to do mammograms every year because the radiation it emits may do more harm than good. I’ve already had 4 mammograms so far.
After the double mastectomy my oncologist wanted me to take Tamoxifen, a cancer drug that would help reduce the chances of the cancer coming back. However I chose not to because my recurrence rate was already low so the potential benefits of taking Tamoxifen were not statistically significant and the side effects would make me experience early menopausal symptoms.


Physically I can barely feel any sensation in my breasts. It feels so odd, almost as if my breasts were not part of my body. Every day it feels numb and sometimes it hurst, which is a common side effect of having a mastectomy.
In the future when I have kids I won’t be able to breast feed, which many mothers claim it builds a physical bond with your baby.
In my everyday life and specially when exercising, I’m limited in my movements, mostly in the chest area. But even normal household duties can sometimes be difficult, even something as simple as to holding a heavy pan in front of me.
So to sum it up, the possibility that the cancer may come back is always in the back of my mind, and I keep questioning why I even got it in the first place. Specially considering that I did the BRCA genetic testing and results were negative, plus there’s no cancer history in my family.
All in all this is a lot to process, but it’s not going to stop me from enjoying life! If you or someone you know is going through a similar situation feel free to leave a comment or contact me.
